

This post may contain affiliate links.
Are you looking for DIY Pottery Barn wreath and window swag ideas? If so, you are in the right place!
I came across this photo a few years ago in a Pottery Barn catalog that I had received in the mail. Immediately, I tore it out and tucked it away in my “IDEAS” folder. As I was searching Pinterest boards for inspiration on how to decorate the front of our home for the holidays this year, I just could not get that picture out of my head. I loved how all the pieces coordinated together and created a look that was both classic and beautiful (without looking overdone).
I would have loved to have just ordered the items from the catalog then and there, but the price was beyond my decorating budget. And there was one thing that I really wanted that the Pottery Barn items were missing…the added twinkle of lights. So, I decided to DIY my own Pottery Barn inspired wreath for less.
Secret Savvy Tip #1: Shop for your supplies either right before Christmas (approx. Dec. 22-24th) or right after on Dec. 26-29) to save the most on this project.
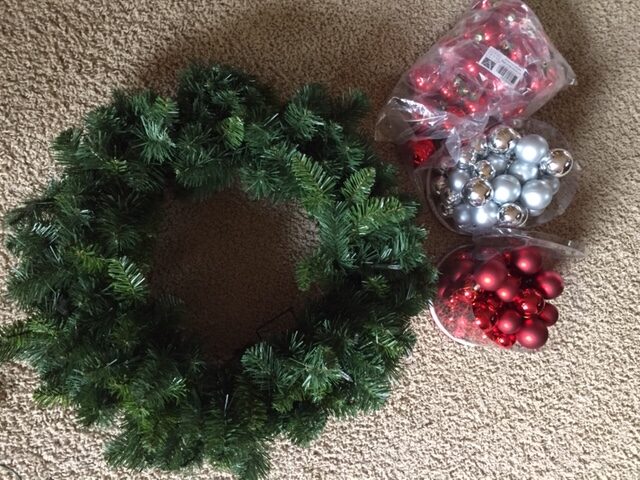
Supplies for wreath:
- Pre-lit battery operated wreath from Target.
- Green Floral Wire- I used some I already had, but click here for similar floral wire
- wire cutters
- 3 sizes of round shatterproof ornaments (I used: 2.4″ shiny red, 2″ matte red and silver, 1.5″ shiny red and silver). Here are the 3 links to purchase the ornaments: Large Red, Red Set, Silver Set*
*Please note: At the time this post was written, the 24-piece Large Red Ornaments were out of stock. Here is the link to a similar larger set: Vickerman 60-piece shiny red
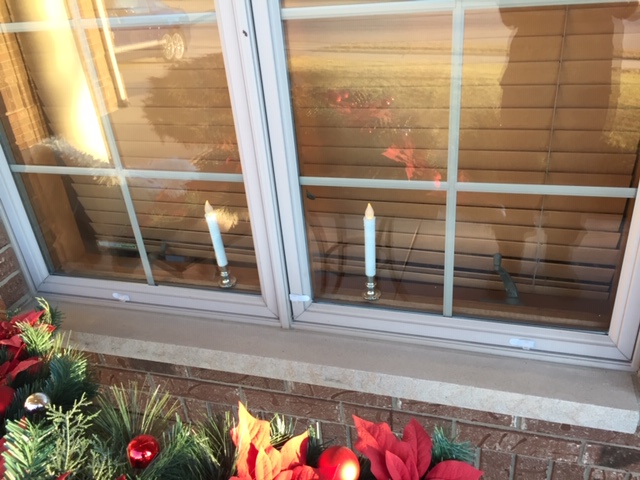
Additional Supplies for window swag:
- Poinsettia & Ornaments Artificial Pine Swag from Target, 2 per window
Directions for wreath:
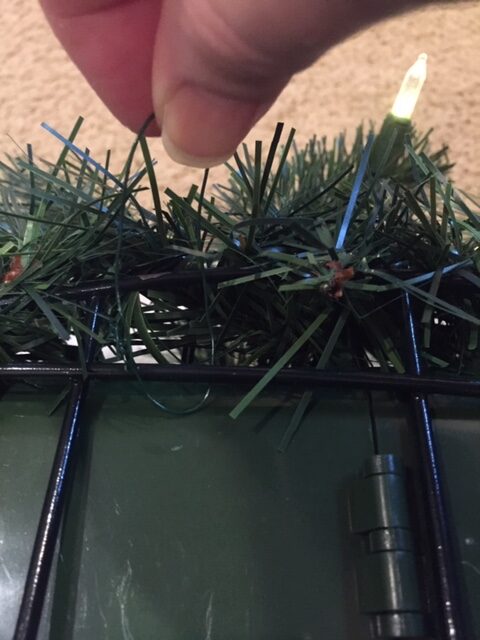
1. Take some time to shape the branches on your wreath before you start to add ornaments. I found that several of my branches were tucked in behind the metal ring of the wreath. Trust me, you don’t want any of those beautiful branches to be hidden!
2. Use floral wire to make a hanging loop on the back of your wreath. I chose to put the battery pack at the top of my wreath in order to use the top horizontal bar holding the battery pack for the location of my hanging loop.
3. Now it’s time for ornaments! For my wreath, I used:
- 4 – Large Shiny Red (2.4″)
- 7- Medium Matte Red (2″)
- 9- Medium Matte Silver (2″)
- 10-Small Shiny Red (1.5″)
- 12-Small Shiny Silver (1.5″)

First, evenly space out the large shiny red ornaments and wire securely to branches.
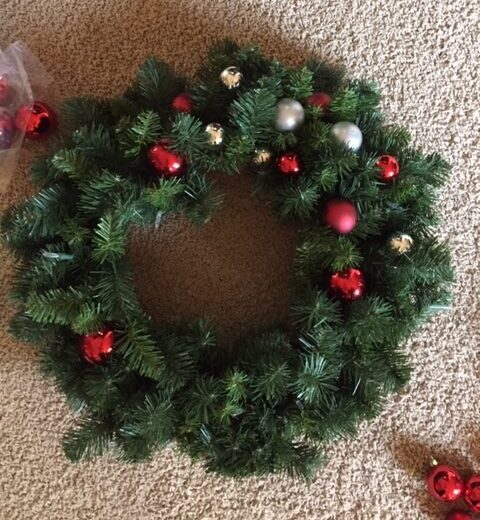
After that, I found it easiest to add the rest of the ornaments in a clockwise direction using an enlarged photo of the Pottery Barn wreath as a guide (or you can use a zoomed-in photo of mine). However, I did have to add a few more ornaments than the Pottery Barn wreath since the one from Target was a little larger. Attaching the ornaments will take a little over an hour to do – and that’s it! Super easy! I didn’t even trim the excess wire on the back. Tucking the wire ends among the greenery should be sufficient- and it keeps you from accidentally snipping those pretty lights!

4. Hang and enjoy your new DIY Pottery Barn wreath!
Secret Savvy Tip #2: Make sure to use your leftover ornaments! I plan to use mine to make a coordinating oversized wreath for above my garage door. Other ideas include matching garland, window swags (below), or as a filler inside a lantern.
Directions for window swag:
1. Carefully remove the top (large) poinsettia from each of the 2 teardrop-shaped swags.

2. Take the two teardrops and place the widest ends together. Twist the hanging loops and the first couple of branches together so that it becomes one piece. Use some floral wire to further reinforce the connection at the center.
3. Reattach only one of the poinsettias to the center of the swag.
4. Add a few extra ornaments to the swag so that it coordinates with your new wreath!
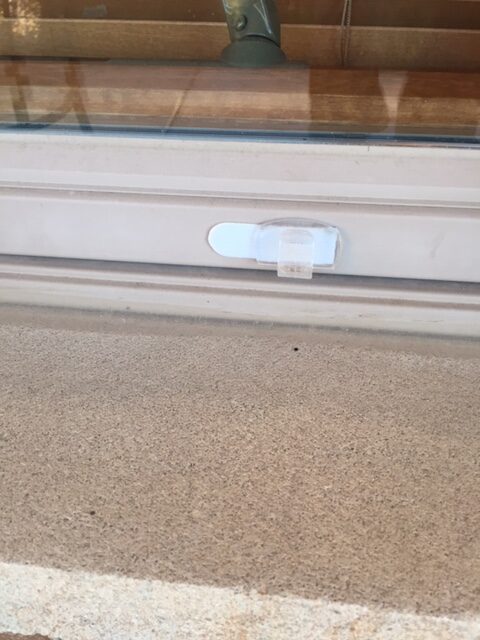
5. Attach to window trim with OUTDOOR Command clips. Another option would be to use a curtain tension rod.

6 comments
This is adorable! Thanks for sharing. I can’t wait to make this wreath!!
Those are really fun and so super cute. I love to create my own decorations and this looks like a fun project. Thanks for sharing.
Great tutorial! Super cute wreath. I love the idea of the swag on the window. I will have to try that!
I love that wreath. Pinning for next year!
This is beautiful! I would love to make one for next Christmas!
Absolutely Beautiful! The window swag is really unique and attractive!